2-登陆界面书写
About 3 min
2-登陆界面书写
1. CSS重置
- 在文件的 /public/ 下新建文件 /css/reset.css文件
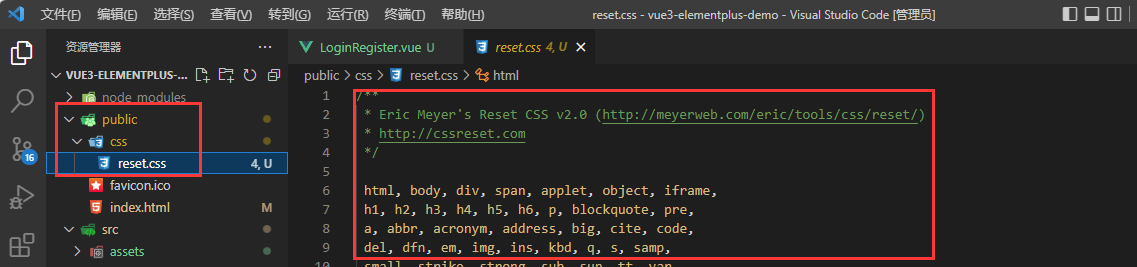
百度搜索 reset.css 将代码复制并粘贴至css文件
将CSS文件link到html文件

2. 下载 Element-Plus
Element-Plus官网:https://element-plus.gitee.io/zh-CN
安装
$ npm install element-plus --save
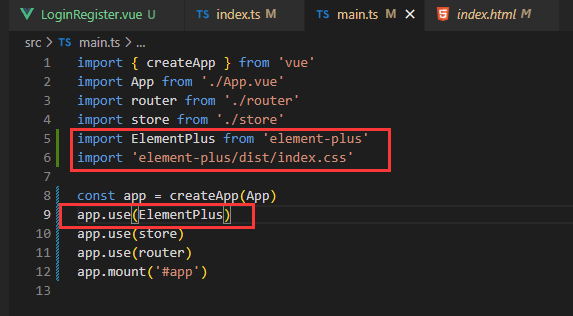
3.配置 main.ts 文件
- 头部引入Element-Plus
- 配置use ElementPlus
4.配置 APP.vue 文件
<template>
  <div id="app">
    <router-view />
  </div>
</template>

<style>
html,
body,
#app {
  width: 100%;
  height: 100%;
}
</style>
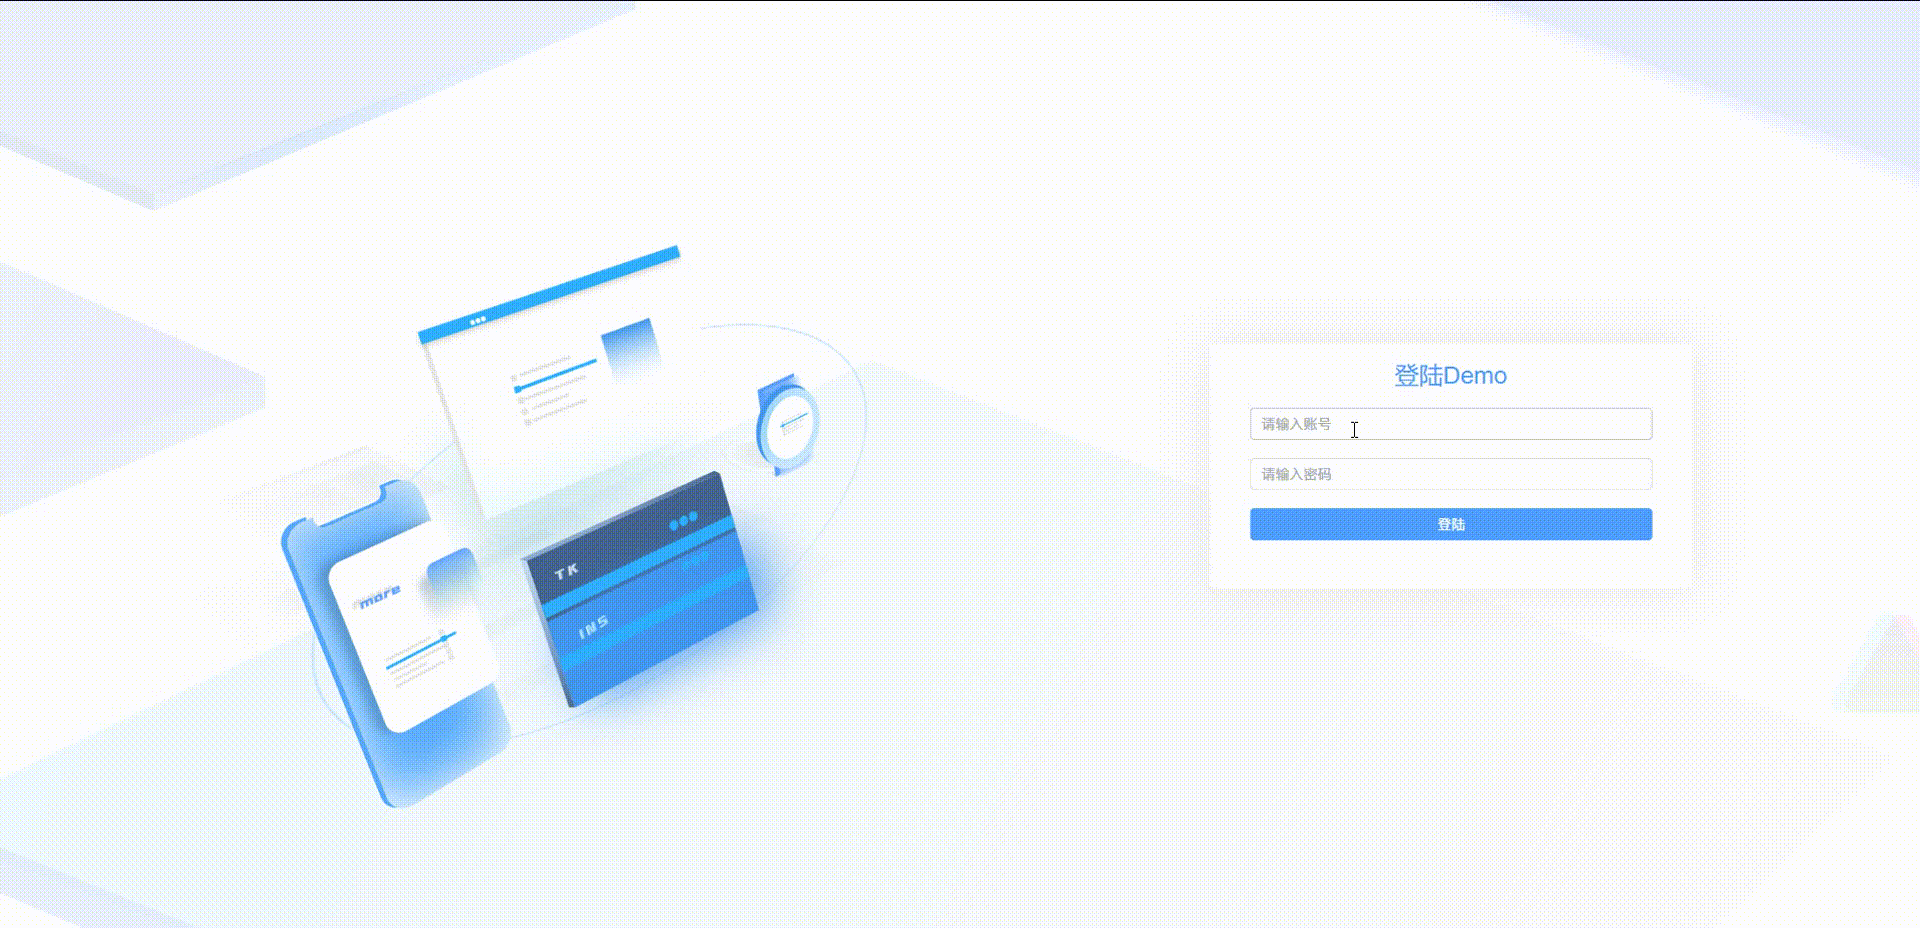
5. 书写Login文件
- 在 /views/ 目录下创建 /Login/Login.vue
- 使用 Element-Plus 组件元素创建表单,并排版CSS
Tips
:model="loginUser":创建 ref
:rules="rules" : 创建 规则
@click="handleLogin('loginForm')" 创建 点击校验事件
vue部分:
<template>
    <div class="container">
        <div class="forms-container">
            <div class="loginbgicon"></div>
            <div class="signin-signup">
                <!-- 登陆 -->
                <div class="signbox">
                    <div class="titletext">登陆Demo</div>
                    <el-form ref="loginForm" :model="loginUser" :rules="rules" class="loginForm sign-in-form">
                        <el-form-item prop="email">
                            <el-input v-model="loginUser.email" placeholder="请输入账号" />
                        </el-form-item>
                        <el-form-item prop="password">
                            <el-input  type="password" v-model="loginUser.password" placeholder="请输入密码" />
                        </el-form-item>
                        <el-form-item>
                            <el-button type="primary" @click="handleLogin('loginForm')" class="submit-btn">登陆</el-button>
                        </el-form-item>
                    </el-form>
                </div>
                <!-- 注册 -->
            </div>
        </div>
    </div>
</template>
css部分:
<style lang="less" scoped>
.container {
    position: relative;
    width: 100%;
    min-height: 100vh;
    // background-color: #fff;
    background: url("../../assets/images/bg.png") no-repeat;
    overflow: hidden;

    .forms-container {
        position: absolute;
        width: 100%;
        height: 100%;
        top: 0;
        left: 0;

        .loginbgicon {
            height: 680px;
            width: 700px;
            background: url("../../assets/images/phone-web-icon-all.png") no-repeat;
            background-size: 100%;
            position: absolute;
            top: 20%;
            left: 10%;
        }

        .signin-signup {
            position: absolute;
            top: 50%;
            transform: translate(-50%, -50%);
            left: 85%;
            width: 44%;
            transition: 1s 0.7s ease-in-out;
            display: grid;
            grid-template-columns: 1fr;
            z-index: 5;

            .signbox {
                width: 400px;
                padding: 40px;
                border-radius: 5px;
                background: #fff;
                box-shadow: 0 0 50px #ece9e9;

                .titletext {
                    width: 100%;
                    text-align: center;
                    color: #409EFF;
                    font-size: 24px;
                    margin: -20px 0 10px 0;
                }

                .loginForm {
                    position: relative;
                    top: 10px;

                    .submit-btn {
                        width: 100%
                    }
                }
            }

        }
    }
}
</style>
6. 进行表单数据校验
<script>
import { ref,getCurrentInstance } from "vue";
export default {
    name: "LoginRegister",
    components: {},
    setup() {
        const{ ctx } = getCurrentInstance();    //由于新版本无法识别this 所以需要const一个自定义名称
        const loginUser = ref({
            email: "",
            password: ""
        });

        //校验规则
        const rules = ref({
            email: [
                {
                    type: "email",              //指定校验的类型
                    message: "邮箱无效",         //校验错误信息
                    required: true,             //校验返回
                    trigger: "blur"             //失去焦点时进行验证
                }
            ],
            password: [
                {
                   trigger:"blur",
                   message:"密码无效",
                   required:true
                },
                {
                    min:6,                      //密码校验 - 最短长度
                    max:15,                     //密码校验 - 极限长度
                    message:"密码长度有误",
                    trigger:"blur",
                    required:true
                }
            ],
        })

        //触发登陆方法
        const handleLogin = (formName) => {
            ctx.$refs[formName].validate((valid) => {       //开始验证登陆按钮点击事件
                if (valid) {
                    alert("Success!");
                } else {
                    console.log("Error");
                }
            })
        }
        return { loginUser, rules ,handleLogin}             //返回数据
    },
}
</script>
7. 配置路由 router 文件
- 配置 path 、name、component
import { createRouter, createWebHistory, RouteRecordRaw } from 'vue-router'
import HomeView from '../views/HomeView.vue'

const routes: Array<RouteRecordRaw> = [
  {
    path: '/Login',
    name: 'Login',
    component: () => import('../views/Login/Login.vue')
  },
  {
    path: '/:catchAll(.*)', //正则所有界面
    name: '404Page',
    component: () => import('../views/404/404Page.vue')
  },
]

const router = createRouter({
  history: createWebHistory(process.env.BASE_URL),
  routes
})

export default router